


hbCyber
TTRPG Hobbyist & Nerd
The steps below will teach you how to setup a professional-grade voice modulator with 100% free technologies that you can use with Discord, Skype or any other voice chat software (including games) on your Windows computer.
For the purpose of this tutorial, I will assume that Discord will be used as the voice chat software.
Warning: Please note that the procedure below is very technical. You will be installing multiple programs and the initial setup process is quite tedious. Unless you are experienced with computers and/or fiddling with software in general, be forewarned that the procedure may prove to be challenging or frustrating.
Furthermore, you should expect rare occasions where the VSTHost program (the modulator) will hang and need to be restarted. On other rare occasions, your sound may become glitchy and you will also need to restart VSTHost to fix this. It will not be often, but you should be aware.
Besides the technical procedure, the process through which voice effects are configured is also a bit complex, requiring interaction with audio production tools (VST plugins). For those inexperienced in such matters, patience and willingness to learn may be required.
Last but not least, I am not responsible for any issues that could occur with your computer after following this procedure. Proceed at your own risk. This being said, all software installed as per this procedure can be uninstalled if necessary.
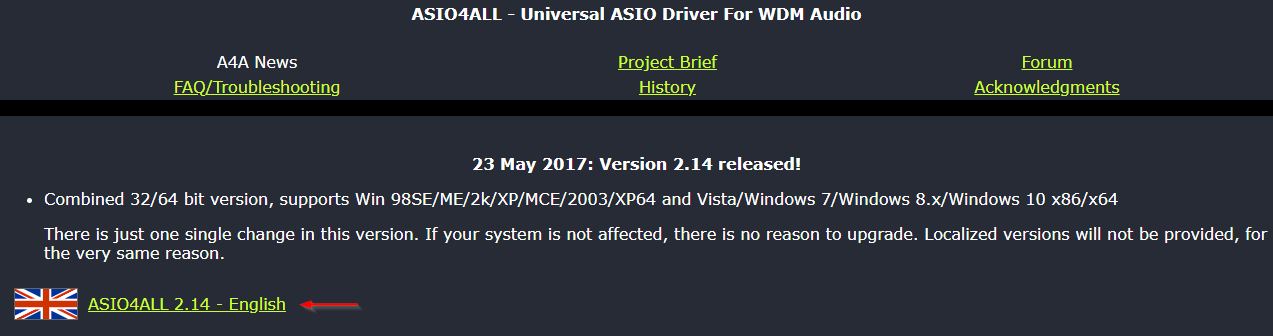
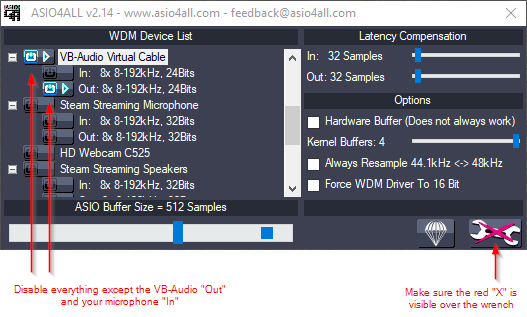
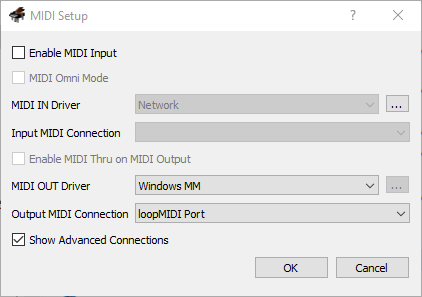
Asio4all will capture the input from your microphone so that we can process it with effects later on.
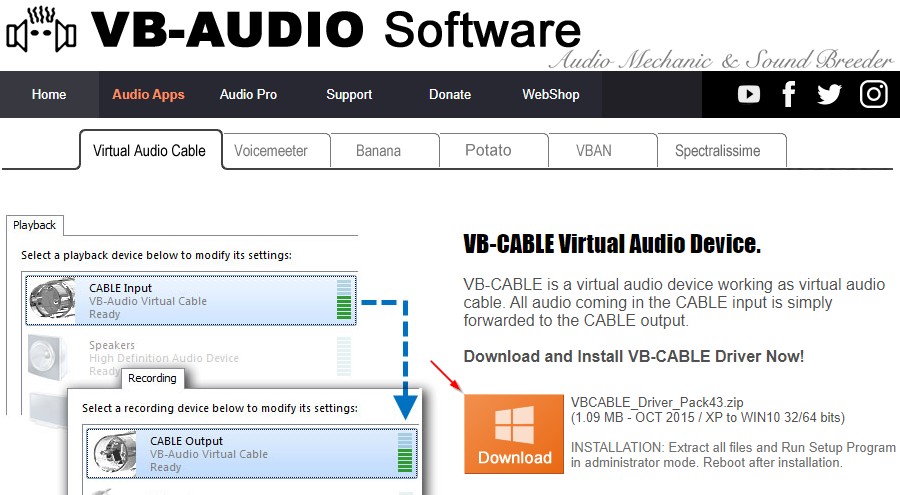
VB-CABLE allows us to take the output from one program (which will apply effects to your voice) and route that signal as the microphone input for another software. In our case, we will redirect the modulated voice to Discord.
VSTHost is the program which will allow you to setup and apply various effects to your voice before its audio is forwarded to your voice chat software (i.e. Discord).
C:\VSTHost\.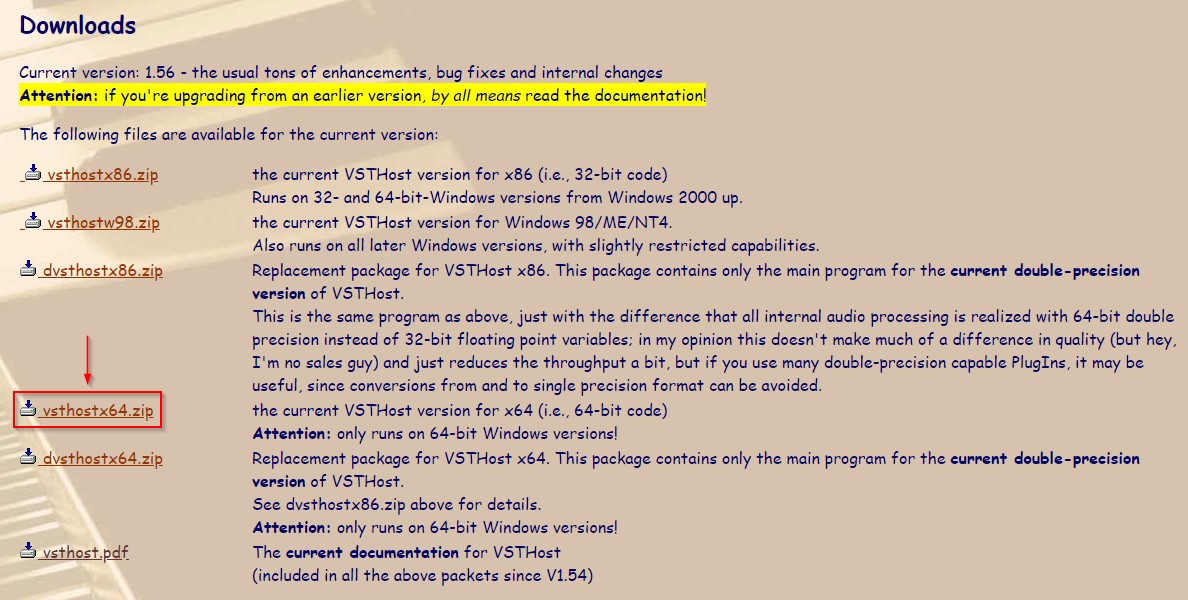
The procedure below only needs to be done one time to setup everything. Once it’s done, the settings are saved and you won’t have to do this again, even if you reboot.
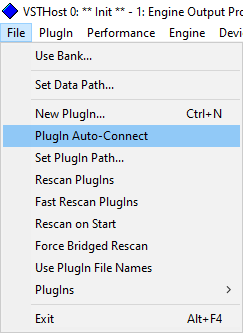
Launch VSTHost (execute vsthost.exe in the folder where you extracted the VSTHost package). Then:

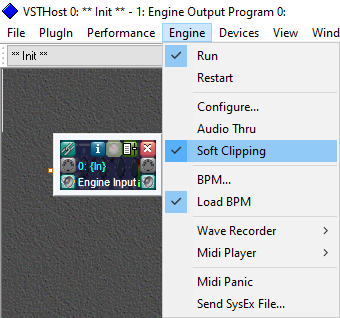
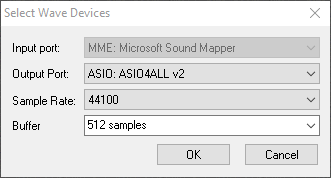
We will now configure Asio4all to capture the sound from your microphone and feed it to VSTHost.
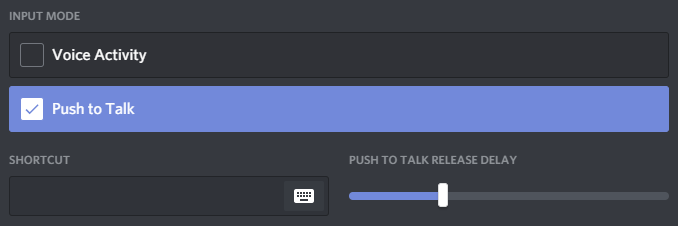
Tip: If you are not sure which microphone device in the WDM Device List is the correct one, open Discord and access the User Settings → Voice & Video section, and check which device is selected under Input Device.
Important: In the WDM Device List, if your microphone device has a red "X" over it where the blue glow would be, then it means the device is currently in use. This is an issue. Close any application that could be using your microphone and restart VSTHost.
Let’s test to make sure that your voice is correctly routed from your microphone to VSTHost and then to Discord. We will do this by creating a voice with no effects applied at all.
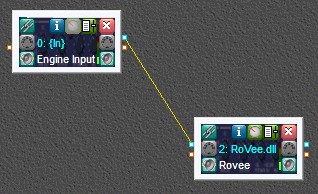
In VSTHost, you should see two (2) boxes with some space between them: {In}, which represents your microphone input, and {Out}, which represents the final audio output that we will route to Discord.
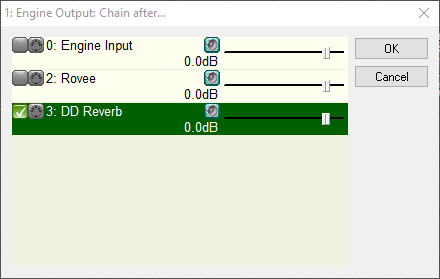
{Out} box, click the top-left Chain button – or right-click the box itself and select Chain After….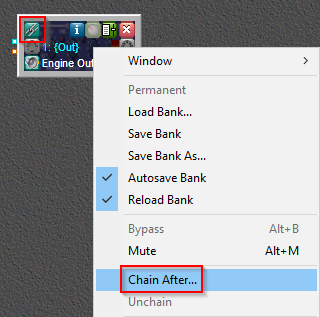
{In} (microphone signal) directly to the output.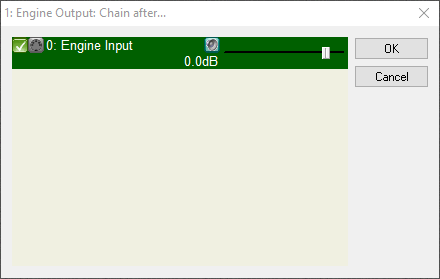
Notice that a line has been drawn between the {In} and {Out} boxes. Later on, we will add effects in-between these boxes to create modulated voices.

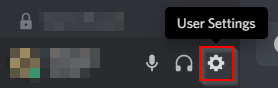
In Discord, access User Settings (gear icon) then Voice & Video.


At this stage, we have confirmed that Asio4all and VSTHost can successfully capture your microphone input and forward it to Discord.
We will save your voice without any effect applied as your default voice which we will use when you do not wish to activate modulation.
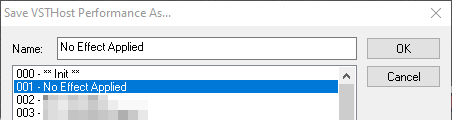
001 (not 000 which might be selected by default!) and write a name such as “No Effect Applied” or something similar.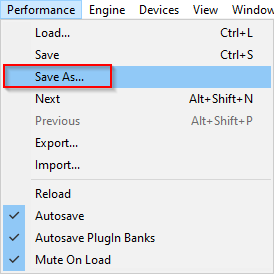
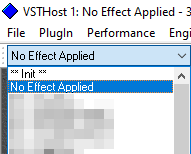
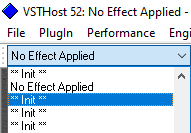
After you’ve saved that voice, you should see the name you wrote selected in the Performance dropdown on the left side under the top menu. This is the dropdown that lets you switch between different voices which you will create later, i.e. toggle between your normal voice and your modulated voice(s).
VSTHost allows you to load modules called VST plugins. These are audio effects that can modulate sound in real-time – which will be your microphone input in this case. Luckily for us, there are a lot of 100% free VST plugins online. They will appear as their own boxes within VSTHost, similar to the {In} and {Out} boxes.
When you download those plugins, they will usually be either:
.DLL files..ZIP files which contain .DLL files..EXE installers which will ultimately produce/extract .DLL files.It is strongly recommended that you try to extract all VST plugin .DLL files in one (1) common location because you will need to load them using VSTHost – so you must remember where you put them. You should put them all in C:\VST\ or somewhere similar.
I propose two (2) sets of plugins below.
Although the Essentials set below may seem limited, it actually allows for an impressive number of modulation possibilities/combinations.
Essentials (in alphabetical order)
| Plugin | Description |
|---|---|
| Dead Duck Effects Bundle |
A bunch of excellent yet simple modulation effects. The most interesting ones are:
|
| La Petite Excite | Simple bass/treble booster (exciter) to make your voice bassier/brighter. |
| RoVee | To adjust the pitch of your voice. Select RoVee ver 1.21 Download from their page. |
Advanced (in alphabetical order)
| Plugin | Description |
|---|---|
| Adam Monroe's Tremolo | Use this if you want to vibrate the volume of your voice very quickly (e.g. helicopter effect). |
| CamelCrusher | A distortion plugin with additional effects to make your voice "phatter". |
| Doppler Dome | Effect which can "vibrate" the pitch and/or volume up and down. |
| KeroVee | Similar to RoVee, it is a pitch shifter which can also "snap"/auto-tune your voice to specific frequencies for robot-like effects. Select KeroVee ver 1.61 Download from their page. |
| Lizard Morph | Morphing plugin which can truly "alienize" your voice. |
| Manda Audio 7Q | To easily adjust the volume of specific frequencies. |
| MeldaProduction MFreeFxBundle | A bunch of excellent modulation effects. The most interesting ones are:
|
| PiF Vocoder | A powerful Vocoder which can modulate your voice by blending it with another sound. Use in conjunction with DD SigGen and DD Utility to pan the voice to the left channel and the sound/noise to the right channel. |
Note: The VSTHost program can basically load most VST effect plugins. If you are already familiar with finding and downloading such plugins, feel free to use any other effect you enjoy in your voice modulator!
Once you have installed the desired VST plugins (e.g. .DLL files in C:\VST\), we will use them to create our first effect. Specifically, we will learn how to:
{In} and {Out}.{In} box (microphone input) through the effect(s) before reaching the {Out} box.Open Discord and activate the Let’s Check feature again so that you can hear your voice as we are applying the effects.
Then, open VSTHost and perform the following:
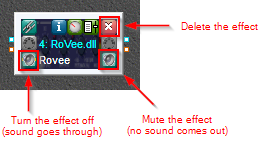
{In} and {Out} are not connected by default. For now, you will no longer be able to hear yourself in Discord.{In} and {Out}. Access File → New PlugIn….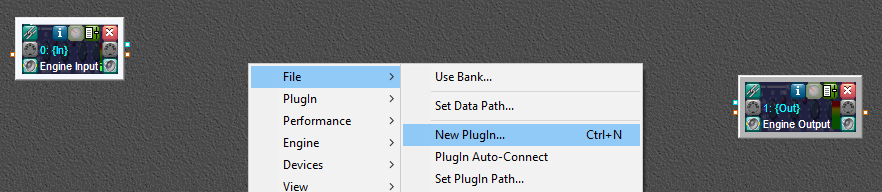
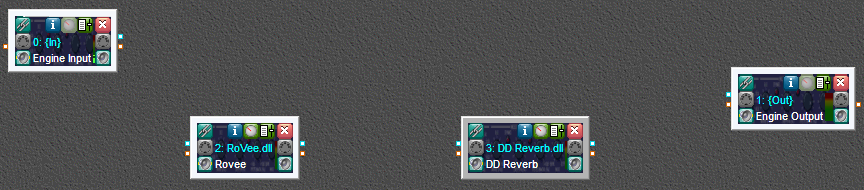
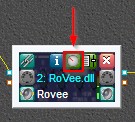
RoVee.dll) plugin. A box will be added to the main area.DD Reverb.dll) plugin. Another box is added.Tip: You can move the boxes around by dragging them, i.e. holding down the left mouse button and moving the mouse.
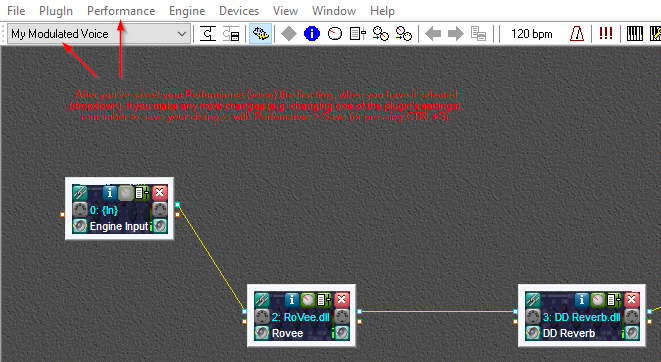
At this stage, you should see the following boxes:
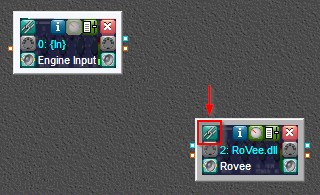
You will notice that the {In} box and the RoVee box are now linked (yellow line).
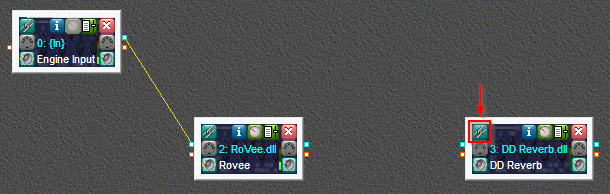
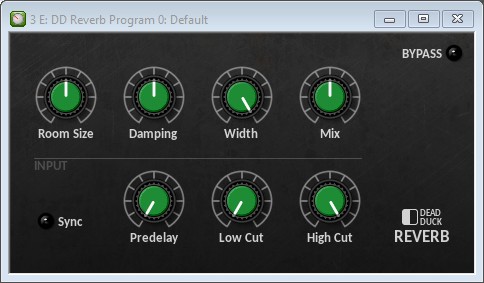
You will notice that the RoVee box and the DD Reverb box are now linked (yellow line).
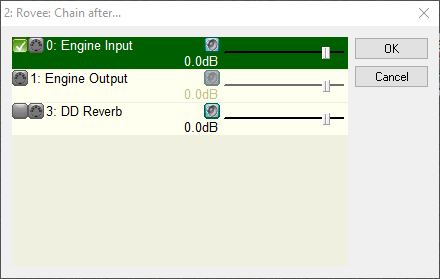
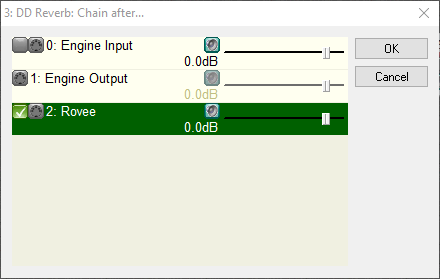
{Out} box’s chain icon, and select the DD Reverb effect from the list, so that the voice modulated by DD Reverb is then forwarded to the {Out} output signal (which is sent to Discord).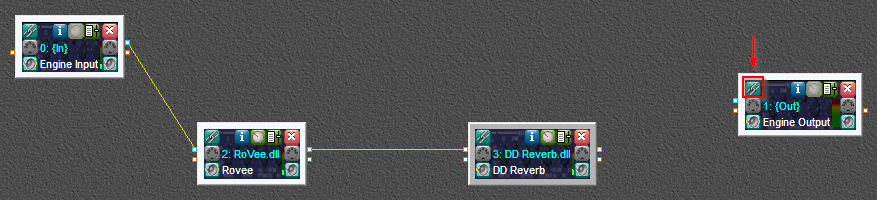
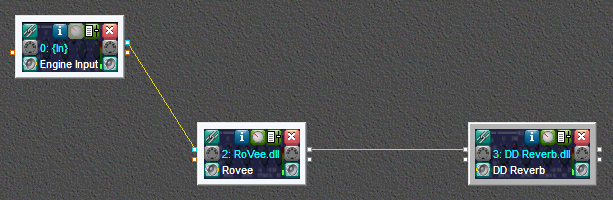
You will notice that the DD Reverb box and the {Out} box are now linked (yellow line).
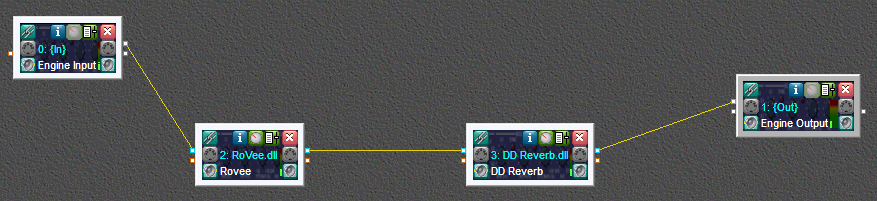
At this stage, there is a continuous/uninterrupted connection between {In} and {Out} which goes through the effects you’ve loaded.
And if you speak now, you should hear your modulated voice (assuming you have activated the Let’s Check microphone check in Discord)! It will sound very high-pitched and echoey. We will learn how to tweak/configure the effects next.
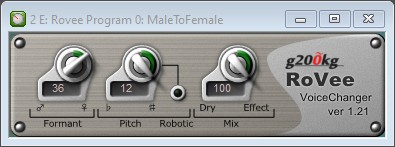
-20 to see how that sounds like.-5 to see how that sounds like.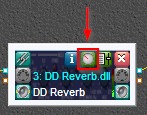
The steps you followed above basically represent the overall method to create any voice.
.DLL files).{In} reaches {Out}.As you create other voices in the future, note the additional VSTHost functions below:
At this point, your new voice is completed. We will save it so that you can use it at a later time. A voice like this is referred to as a Performance in VSTHost, so we will save your current “Performance”.
002 (below your “No Effect Applied” voice) and write a name for this modulated voice you just created.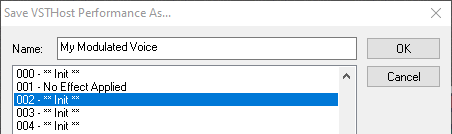
After that, while you have this voice selected, if you make any more changes, you can access Performance then click Save (or press CTRL+S) to ensure your changes are saved.
Now let’s try switching between your regular voice and your modulated voice:
You could stop the initial set-up tutorial here if this is good enough for you as the method for switching between voices. However, if you’d prefer to have another way to switch without having to bring up the VSTHost window every time and activating the dropdown, see the instructions right below to setup remote control.
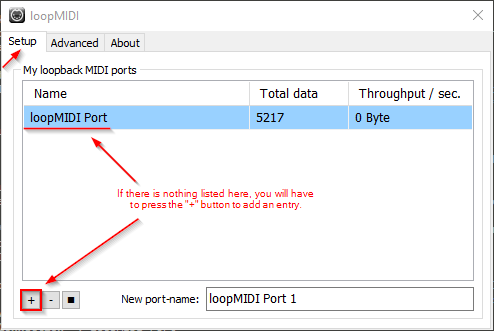
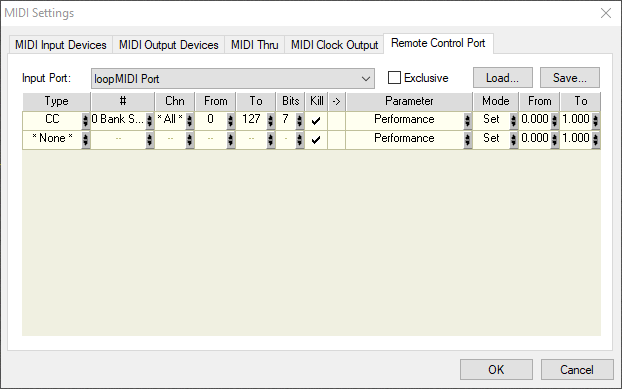
This method will allow you to switch between Performances (voices) while using another window. Reminder: The steps below only need to be done once as part of the initial set-up.
We will be using two (2) applications to make this happen:
Download and install:
Then, follow the instructions below:
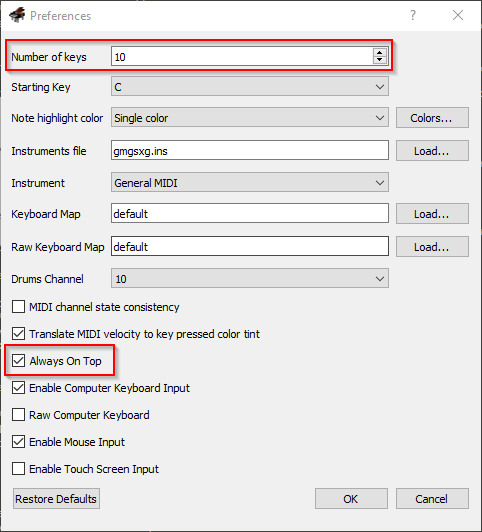
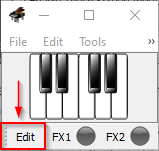
You should now see a small button that you can toggle on/off in the bottom bar. This is the button we will use to switch between your unmodulated VSTHost Performance and your VSTHost Performance which includes the special effects.
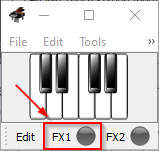
You should now resize the Virtual MIDI Piano Keyboard window to its smallest possible size.
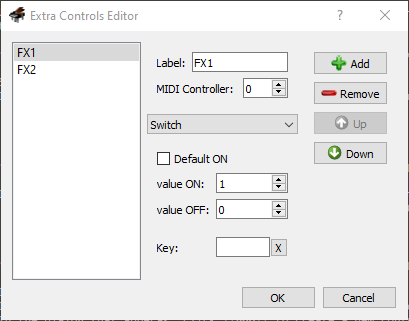
We will now teach VSTHost to react to the Virtual MIDI Piano Keyboard button we created.
Time for a test run!
If everything worked right, the VSTHost dropdown automatically switched between your no-effect voice and your modulated voice as you pressed the button in Virtual MIDI Piano Keyboard. You can now simply use Virtual MIDI Piano Keyboard to trigger modulation.
If you want, you can create additional VSTHost Performances (voices) and add more "FX" buttons in Virtual MIDI Piano Keyboard.
002, 003, 004, etc. while your unmodulated Performance with no effect remains in slot 001.1 will trigger Performance 002.2 will trigger Performance 003.3 will trigger Performance 004.Once the initial setup has been completed, here’s what you need to do whenever you want to use your voice modulator:
That’s it! You can switch between your unmodulated voice and unmodulated voice(s) at any time.
As long as you have configured Discord to use CABLE Output (VB-Audio Virtual Cable) as the input microphone, people won’t hear you unless you have VSTHost opened and you have selected a Performance that connects the {In} and {Out} boxes. As such, if you are done using the modulator, I suggest you close VSTHost and switch the microphone back to your normal microphone device in Discord.
As long as VSTHost is opened, your actual microphone device will be considered to be “in use” (as it will be managed by Asio4all), so you will not be able to use any voice chat application that is set to use your microphone directly (as opposed to using CABLE Output (VB-Audio Virtual Cable) as the microphone input). You will have to close VSTHost to free up your microphone.